
Don’t know about you, but we’ve been collectively preparing ourselves, both mentally and physically (there’s been a lot of cleansing hot water and lemon), for the oncoming feast on Thursday—and the after effects that (we’re hoping) will last all weekend long. And we plan on making the whole extravaganza as gastronomically worth it as possible. Turkey is going to be good, but we already knew that. It’s the rest of it that we’ve taken on as our mission. And with our (somewhat) healthy mindset in tact, too. So we called in the Hemsley + Hemsley team, because no one does festive, delicious, yet not totally glutinous (even if it feels like it) food as well as them—in our humble opinions. See you in the kitchen—we'll bring the cab sav.
We really love a good celebration, and now that we’re well into the month of November, we’re gearing up to mark the festive season in style, and in the best way we know how—with family, friends...and feasts! With Thanksgiving just around the corner and so many American friends here in London we’ve taken up this tradition as a bit of a dress rehearsal for Christmas Day.
We believe that good food is the food that makes you feel good, and over the years we’ve created wholesome and satisfying recipes that deliver the same wonderful flavours without leaving you feeling sluggish or uncomfortably full. For example, we like to start off a dinner party with our refreshingly light cucumber maki crab rolls to whet our guests’ appetites without filling them up—hold the bread. Bone broth is another favourite of ours that sneaks in all year round and of course makes the ultimate gravy—extra nutritious and loaded with flavour with no need for stock cubes! Then, if you want to send your guests home still talking about the meal a week later, don’t forget to serve our avocado lime cheesecake. [Editor's note: They're not kidding about that last bit; make this recipe now and have your mother-in-law-to-be (and his sister!) fall in love with you forever.]

When it comes to a turkey, we know that everyone has their own secret recipe, so we got to thinking about an easy, elegant menu to accompany it. We’ve settled on three fun to make recipes for a starter, side dish and dessert that will complement the main dish perfectly, and add that extra-special something to your Thanksgiving feast: our show stopping beetroot and goat’s cheese terrine to start, our signature cauliflower mash to keep it light and delightful, and salted apricot caramel petite fours to finish. Simple, stress free, and they can all be made ahead of time.
Beetroot and Goat’s Cheese Terrine

Our beetroot and goat’s cheese terrine is a bright and beautiful starter, that looks sensational and never fails to impress; just layer up those fresh colours and pop it in the fridge until you’re ready to serve! This dish celebrates the unbeatable combination of creamy, salty goat’s cheese and sweet, earthy beetroot; the flavours are tied together with a sprinkling of herbs and garlic, for a truly flavoursome start to the meal. If you have any vegetarians at your table, this is also a great way to please everyone at once.
INGREDIENTS:
Serves 6-8
4 purple beetroot (approx. 300g)
4 golden or any other colour beetroot (approx. 300g – the more colours the better)
2 tbsp freshly snipped chives
2 tbsp freshly chopped parsley
1 tbsp dried oregano
2 garlic cloves, finely grated
400g goat’s cheese
Sea salt and black pepper
one >> Line a 10 x 20cm loaf tin with baking parchment, leaving enough paper hanging over that you can easily cover the terrine when the tin is full.
two >> Scrub the beetroot, then place in a pan, cover with water, pop on the lid and cook for about 30-40 minutes until tender. Set aside to cool, then peel.
three >> Meanwhile, mix all the herbs and garlic with the goat’s cheese in a bowl and season to taste.
four >> Slice the cooked beetroot into various thicknesses, some 3mm, some 5mm.
five >> Put a layer of golden or candy-coloured beetroot along the bottom of the tin, followed by a thin layer of the garlic and herb goat’s cheese mix. Do this for 6 layers of each, so you have 12 layers in total, and then start on the purple beetroot and cheese layers until you reach the top. It you have more colours, vary them as you go along.
six >> Pull the baking parchment over so the whole terrine is covered. Place a weight on top of the tin and leave in the fridge overnight or for 8 hours to set.
seven >> Cover the set terrine with a plate and turn upside down to remove it from the loaf tin. Slice and serve or refrigerate the terrine until needed.
Cauliflower Mash
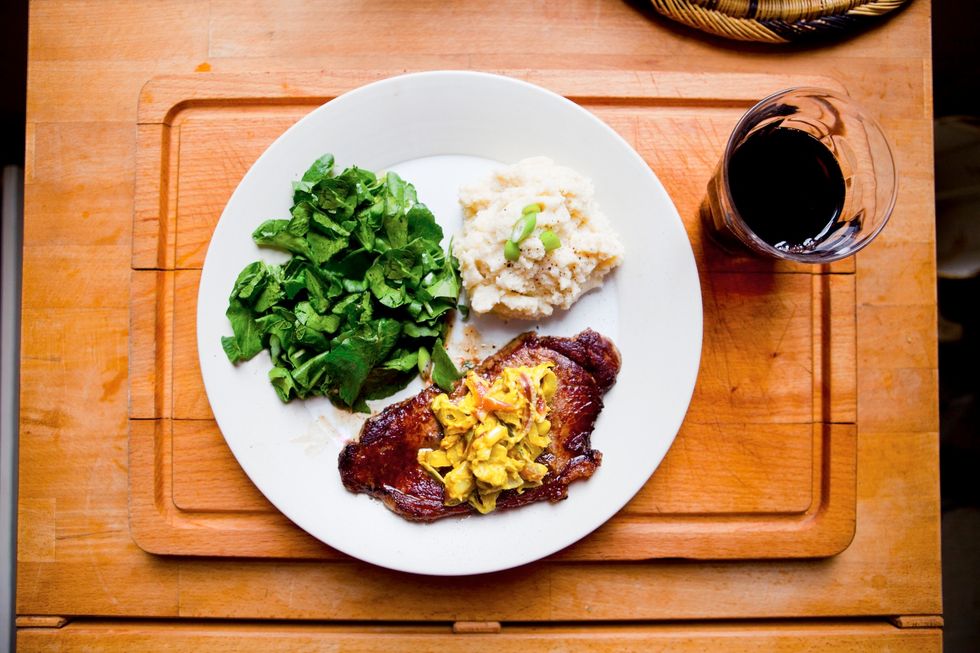
This year, why not swap your mashed potatoes for a more nutrient-dense but equally delicious cauliflower mash? Instead of loading up on starchy carbohydrates, you’ll be enjoying an antioxidant-rich veg that’s full of essential vitamins and minerals—and you won’t have to peel a single potato! This dish is super simple to make, and the end result is a tasty, creamy mash that’s a lighter alternative to heavy spuds. Make it your own with some chopped chives or spring onions, and top it with grass-fed butter and cheese for some additional healthy fats and that wonderful rich flavour.
INGREDIENTS:
Serves 4
2 small garlic cloves, peeled
2 large cauliflowers (outer green leaves removed)
1 tsp of English mustard
1 tbsp of butter to blend and 2 tsp of chopped up butter to top the mash
Sea salt and black pepper
Optional
2 tsp of chopped chives or 1 finely sliced spring onion
60g of mature cheddar cheese, grated
one >> Roughly chop the cauliflower into equal sized pieces.
two >> In a saucepan steam the cauliflower and whole garlic cloves with just a few tablespoons of water, lid on, for 5 minutes or until the cauliflower is tender. Use a knife to check.
three >> Remove the pan from the heat, drain any excess liquid and add the butter, grated cheese and mustard. Blend or mash until creamy and smooth. If it's too sloppy or wet allow some of the moisture in the mash to evaporate on a low heat.
Salted Apricot Caramels
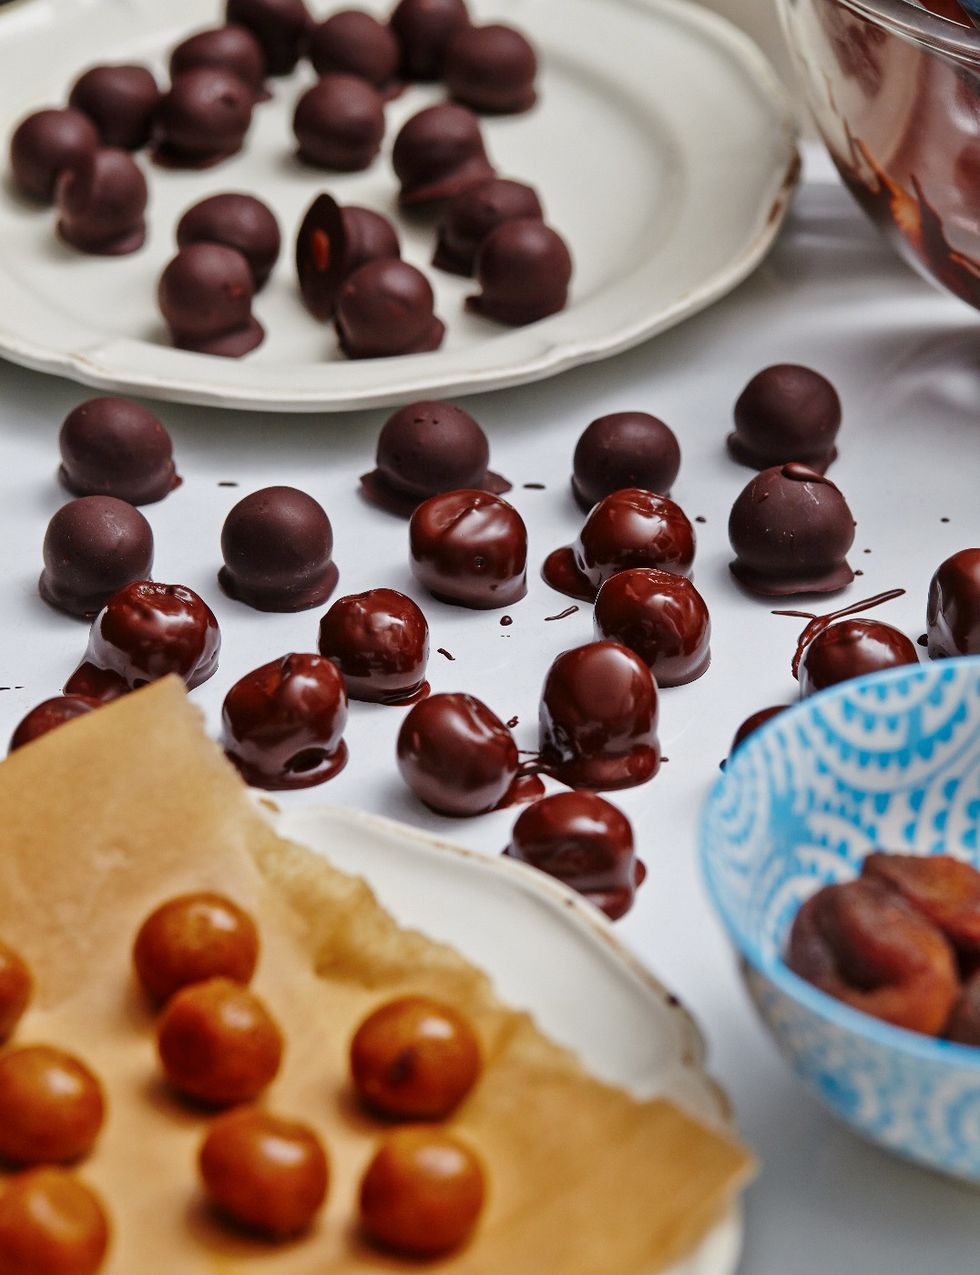
If your Thanksgiving dinners are anything like the ones we’ve had, about halfway through the meal nobody can imagine being able to start—let alone finish—dessert. That will all change as soon as your guests lay eyes upon these delicious salted apricot caramels—little balls of heavenly sweet and fudgy organic apricot, balanced with a sprinkling of sea salt and surrounded by a crisp layer of dark chocolate for a delicately decadent treat. Make plenty for guests to take home as gifts; and since they freeze well, go right ahead and make enough for Christmas.
INGREDIENTS:
(Makes approx. 50 Salted Apricot Caramels)
250g organic, unsulphured, dried apricots (not orange or soft), chopped
1¼ tsp sea salt
80g butter or coconut oil
2 tbsp hot water
1 tsp vanilla bean paste or vanilla extract (not essence)
100–200g (85% cocoa solids) dark chocolate (or use our homemade chocolate recipe from The Art Of Eating Well)
one >> Add the chopped apricots, salt, butter or coconut oil, hot water and vanilla to a food processor, pulse a few times, then blend until completely smooth.
two >> Use a teaspoon to scoop out enough apricot mixture to make 1½ cm diameter balls. Roll the mixture between the palms of your hands and place each caramel onto a baking tray lined with baking parchment (if you are struggling, pop the mixture in the freezer for 10 minutes or longer then try again).
three >> Freeze the balls for at least 20 minutes or until ready to dip them.
four >> Slowly melt the dark chocolate in a glass bowl over a pan of warm water, leaving out a couple of small pieces – make sure the water doesn’t touch the bottom of the bowl and don’t let the water boil.
five >> When the chocolate is almost completely melted, take it off the heat and stir in the remaining small pieces. Once all the chocolate is melted, stir in the rest of the ingredients, then leave to cool.
six >> Take a frozen caramel (they tend to stick to the paper) and give it a quick roll between the palms of your hands to smooth.
seven >> Use 2 teaspoons to dip the caramels, one at a time, into the chocolate. Lift them out and let any excess run off, then place them back onto the same tray, leaving plenty of room for the other balls. They will set quickly on the cold tray.
eight >> Once the first layer of chocolate has set, dip the caramels in the melted chocolate a second time, to give them a thicker coating.
nine >> Keep the caramels in an airtight container in the fridge until needed.