
What are your tips for filing and shaping the nail? Any particular tools readers should ensure they have on hand?
It depends on the shape you desire, but I recommend filing gradually from one side to the other side with the finest grain nail file available - but the key is to do it gradually. Taking off too much of the nail with a coarse file is not only damaging to your nails, you might end up taking off more material than you intended to. I like to use a diamond nail file (with a fine grain) so I can sterilize it after each use. Diamond nail files are durable and the well-made ones will last a lifetime with regular use.
What are your favorite base-coats and top coats for an at-home manicure and why? How do they help the process?
I like JINsoon Power Coat base coat because it is a strengthener with no harsh chemicals which protects, primes, and strengthens your nails at the same time. JINsoon Top Gloss top coat has what people looking for when doing at-home manicures - it is quick drying with a high gloss and it prolongs the life of your nail polish.
What are your tips for applying the actual nail color? How many coats should one do? Any tips for even applications without getting polish on the cuticle?
To apply nail polish, try using a well formulated lacquer with a good brush; that way you don't have to worry about any streaks occurring when you apply the nail polish. If you choose a chalky color, which tends to produce streaks, apply a thick base coat and then three thin coats of the color for a smooth, well-done look, and use a top coat.
While the standard is generally two coats of color, the first one counts more. Go a little bit heavier to lay down the color, and then apply the second coat very lightly. Applying two thick layers can lead to smudges. Finish with a top coat, which seals in color and adds extra sheen.Apply polish vertically up the nail to the free edge (the very end of the nail first), then paint horizontally right along the tip to seal the color where it's most prone to chipping.

What's your favorite shade for an at-home manicure?
Definitely nudes such as JINsoon Muse or Tulle because you don't have to worry about a perfect application. People with less nail polish application skill should be good with this because it's more forgiving when you make mistakes like applying the polish unevenly or touching the cuticle areas. If you mess up, it's much less noticeable.
What are your favorite tools and tricks for post-application clean-up?
To clean up polish around the nail mid-mani, use a thin angled eye liner brush dipped in remover. Or, dip an orange wood stick in remover without any cotton wrapped around the tip since the typical orange stick wrapped in cotton will leave fuzz.
What would you say is the single most important tool for an at-home manicure? Any tips for fixing last-minute smudges or chips in a hurry?
The most important tool for an at-home manicure is a mini nail file that has a pointy part on one end so you can file your nails and clean up the nail polish mess and also clean under the nails. Smudges and chips can be re-painted quickly and with less precision if you cover them with a top coat - the top coat helps mitigate any messy appearance of a quick repair.
What's a step clients often skip in giving themselves an at-home manicure that they shouldn't?
I see a lot of clients skip the all-important step of removing residue from their nails before applying nail polish. Thoroughly cleaning your nails is the first step for a long lasting manicure. I also advise against skipping the base coat, unless when you apply nude colors, but the base coat is an absolute must when you apply heavily pigmented colors - it prevents your nails from staining.

What are your tips for filing and shaping the nail? Any particular tools readers should ensure they have on hand?
Remember to look at the hands from every angle. Never ‘saw’ back and forth on the tip of the nail. Instead, gently run the file across the nail in one direction. Beginning at the outside edge, pull towards the center and repeat.
If your nails are thinner and have the tendency to peel or break, be especially careful while filing. Rather than holding the file flush to the nail, tilt it so you are underneath. This allows you to see exactly what you are doing and helps protect against over filing.
In addition to the file, I swear by my Smooth Operator. It is a gentle 4-way buffer with different fabrics for grooming the nails. Side 1 is meant to gently shape the tip of the nail, Side 2 buffs any ridges found on the top of the nail, and Side 3 smooths the nail surface for base coat application. If you aren’t applying a lacquer to the nail, finish with Side 4, a high-shine buffer, to complete your nail grooming routine.


What are your favorite base-coats and top-coats for an at-home manicure and why? How do they help the process?
Just like your skin, nails have different needs. My base and top-coats are specifically formulated to combat these issues. For example, my Rehydrating Base Coat is an ultra moisturizing treatment enriched with Ginseng and Safflower Oil to help smooth and strengthen nails for an overall healthier look. I suggest this base coat for those who suffer from dry or peeling nails. With at-home manicures, I often suggest a fast drying top coat like Addicted To Speed - it is high-shine and super quick-drying.
For those who have ridges, or “lines,” in their nails, I suggest Ridge Filler Base Coat. It is like concealer for your nails. Ridge Filler fills in the gaps and imparts a smooth, matte, bump-free finish. It also covers any discoloration in the nail plate so that light or sheer lacquers appear true to their shade.
Finally, if you are looking for a long lasting at-home manicure, similar to a gel, but without the damage, I suggest Gel Lab Base and Top Coat. It has the same high shine, long-wearing, cushion-like finish of a gel manicure. Plus, you can use this base and top coat with any nail lacquer and receive the same benefits.
Finally, if you are looking for a long lasting at-home manicure, similar to a gel, but without the damage, I suggest Gel Lab Base and Top Coat. It has the same high shine, long-wearing, cushion-like finish of a gel manicure. Plus, you can use this base and top coat with any nail lacquer and receive the same benefits.
What are your tips for applying the actual nail color? How many coats should one do? Any tips for even applications without getting polish on the cuticle?
Remove brush by pulling along the back neck of the bottle. You can see the front of the brush this way and control how much lacquer you will be applying to the nail. Set brush on the back of the center of the nail approximately ¼ inch from the cuticle. Put pressure on the brush, you will see the lacquer begin to flow out of the tip.
Gently nudge the brush ever so slightly toward the cuticle and allow the lacquer to flow. Next, pull the brush directly forward toward the tip of the nail.
Set the brush on the nail to the left of center, ¼ inch from the cuticle. Follow same procedure but as you pull forward, gently press down so that the bristles spread to the far side of the nail.
Repeat on the right side of the nail. Finish by gingerly brushing lacquer across the tip of the nail.
Allow each thin layer of lacquer to dry a one to two minutes between coats. This allows the lacquer to dry faster, adhere better and last longer.
What are your favorite tools and tricks for post-application clean-up?
I recommend taking a tiny piece of cotton and wrapping it around the tip of my Cuticle Pusher. Next, add a little lacquer remover, like The Stripper and simply clean the polish off the skin. You can also use the end of an orange stick.
If you are not in a rush, wait 1-2 hours, and then wash your hands - once your polish is COMPLETELY dry. This will also help remove any excess polish from the skin.
What would you say is the single most important tool for an at-home manicure? Any tips for fixing last-minute smudges or chips in a hurry?
Most important tool is your patience! Waiting one to two minutes between each layer of lacquer application, including the base coat, will allow for faster dry time and longer lasting manicures/pedicures.
If you do have a smudge or chip, less is more. Before applying more lacquer, dab a bit of polish remover, like The Stripper, on pad of your fingertip and smooth ridge/smudge and allow it to dry. Patience is key – if you don’t allow the remover to dry, it may end up looking worse. If the ridge/smudge is still visible, lightly dab lacquer into the chip and allow to dry.
If the lacquer is still wet when the smudge or chip happens, you can apply a very light layer of top coat to smooth out the damage.
What's a step clients often skip in giving themselves an at-home manicure that they shouldn't?
Often times, clients do not use a nail primer before applying their base coat. The natural residue and oils that are left on the nail plate keep the base coat from adhering properly. My 2-Second Nail Primer removes dirt, oil, and residue while adding proteins back to the nail plate.

...On talons versus a square shape (it's all in the nail file, kids):
"First, make sure to choose the right file for your nails. A file’s level of softness is measured in 'grit' and the lower the grit, the more abrasive the file. I recommend nothing lower than 180 for shaping your nails. If your nails are weak, try using a softer glass file. When shaping the nails, I always try to use nail clippers to my advantage. If I am trying to achieve a 'square' shaped nail, I always clip the nails straight across.If I am trying to file the nails to an 'almond' shape, I clip only the sides of the nail. This saves time and energy and provides a guideline for filing."
...On top coat & base coat being a 'BB cream for nails':
"For at-home manicuring, a base and top coat are your greatest allies. They prevent chipping and dry your polish faster. My favourite base coat is 'Ridge Filling' by Essie. I refer to this product as my 'BB cream' for nails. It fills in ridges for a smooth surface, corrects discoloration, protects the nails from polish stains and prevents chipping. It's especially great for streak-free polish application. My favorite top coat is 'Good to Go' by Essie. We all love a fresh manicure, but hate waiting for polish to dry and, frequently our lack of patience leads to smudges and nicks in the polish. 'Good to Go' gives you the upper hand by drying your polish faster all the while providing a strong seal and high shine."
...On the question that's plagued womankind for centuries: which hand to paint first?
"When polishing your own nails, the key is to keep a steady hand. To keep your hand steady, make sure you’re seated with both elbows on a table. Sometimes, I’ll even use my pinky finger to steady my hand as I polish. I also recommend polishing your dominant hand first. It’s very easy to start with what is most comfortable, but it can be very tricky working with your non-dominant hand when it is wearing wet polish. Finally, make sure to have the right amount of polish on your brush. Too much will cause pooling in the cuticle area and too little will cause streaks. For the right amount, make sure to remove all of the polish from the stem and on one side on the brush. This gives you perfect control of the application. For strength and appearance, I always recommend two coats of your polish color."

...On her go-to shades for smudge-free application (yes, there is such a thing):
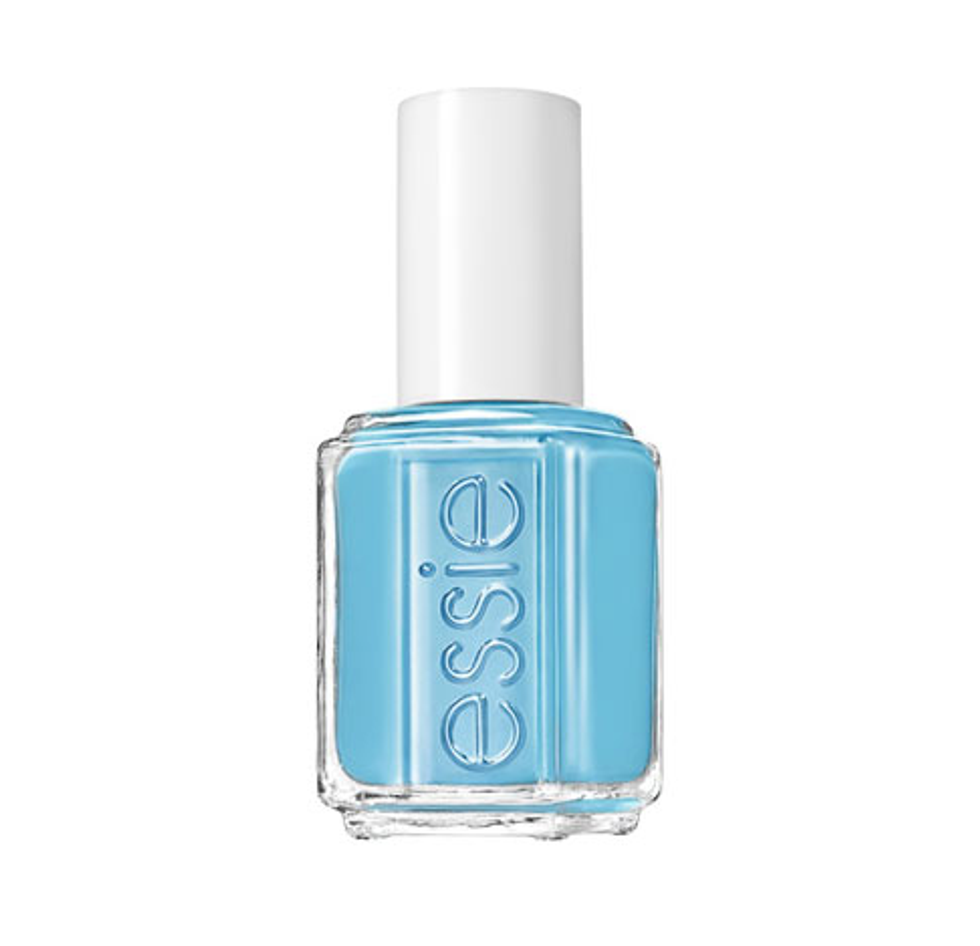
"Polishing your own nails can be tricky. Deep dark reds can be unforgiving if you accidentally polish your cuticle and very pale shades can be tough to master without streaking. For ease of application, I always recommend something in the middle, like Essie’s bright 'Mint Candy Apple'. It applies streak-free with two coats. However, the easiest polishes to apply by far are sheer pinks. 'Mademoiselle' by Essie is the definition of a flawless polish. It looks great with one or two coats, never streaks and is so natural that it is hard to tell when it chips or grows out."
...On the (unexpected) tools necessary for when you inevitably do make a mistake:
"My favorite tool for polish clean-up is one that you’d find in your make-up kit: an angled eyeliner brush. Dip the brush into a small dish of nail polish remover and, with a light touch, wipe away any mistakes. The firm bristles brush away excess polish with ease and the thin, angled shape makes it easy to wipe away, even the mistakes close to nail, without ruining the polish."
"The most important tool is the one specifically intended for the health of your nails: Cuticle Oil. Nail polish is only as pretty as the nails and hands that wear them, so you can't neglect your nail health. With regular use of cuticle oil, you can prevent hang nails and dry cuticles, strengthen your nails and restore health and shine to the entire area. I use Essie’s Apricot Cuticle oil as part of my nightly regime. This way I know that there will be at least five hours (where I won’t be washing my hands) for the product to do it’s job!"
...On touching up smudges without starting from scratch:
"If you’ve just smudged your fresh manicure, dip your finger into a small bowl of nail polish remover and lightly push the smudge back into place. It’s important to use a very light touch so as not to smudge the polish even further. Once it’s dry, apply another layer of top coat to smooth the surface. To fix a small chip, make sure you have the original polish color handy. With a very small amount of polish on your brush, lightly dab the colour into the area that chipped. Let the area dry and then seal with a topcoat."
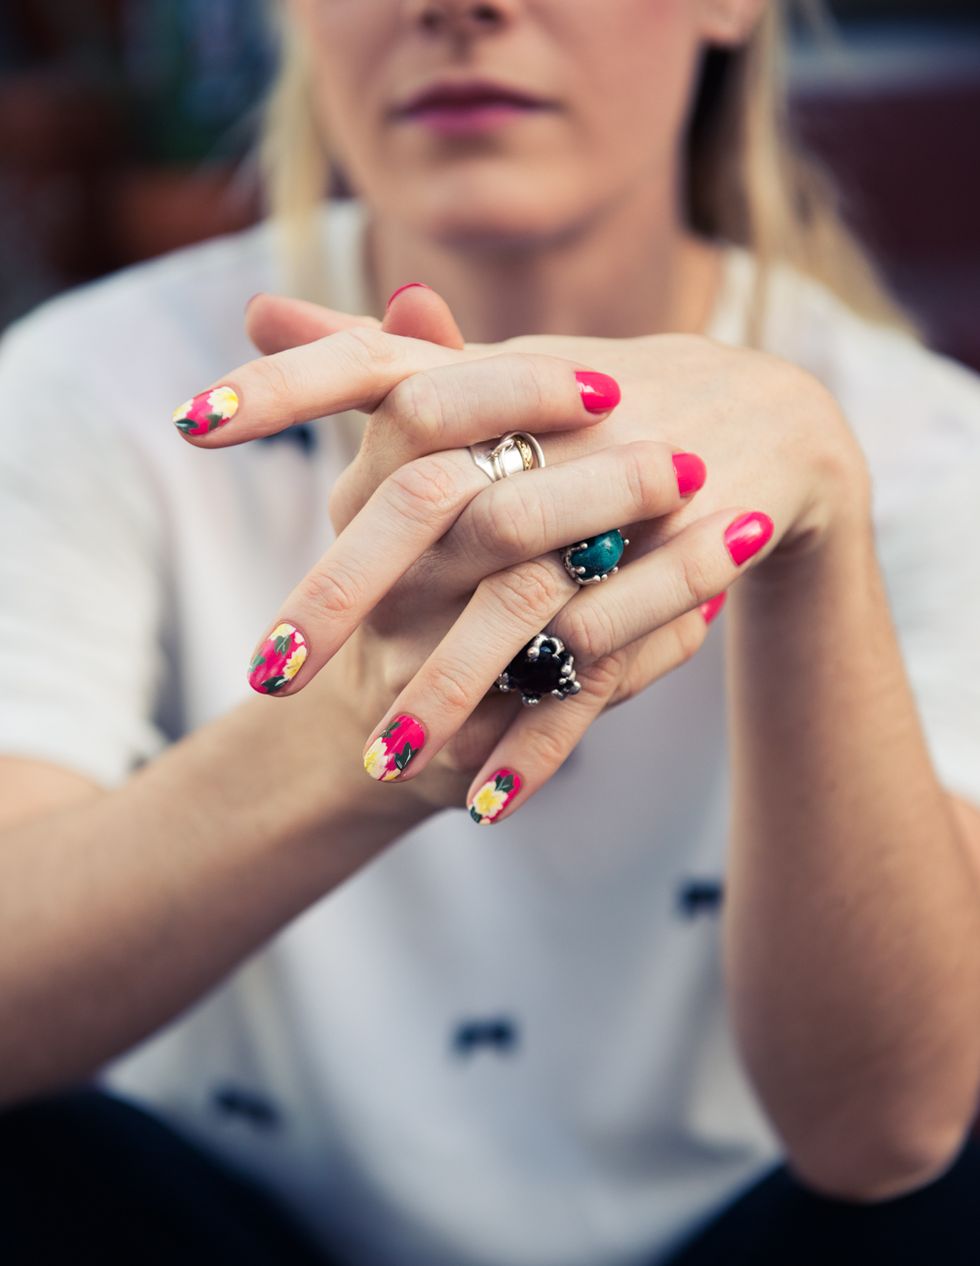
...On her genius (& glittery) hack for touching up that salon manicure:
"If you don’t have the original color handy, turn the chipped manicure into nail art with glitter! Dabbing a bit of glittery nail polish, like Essie’s 'Set in Stones', to the tip of each nail is a fun and easy way of refreshing a week-old manicure."
...On the one step you should seriously never skip (and that we're all guilty of):
"Oftentimes, the culprit of chipped polish is oily nails. Our natural nails carry plenty of oil and residue that could interfere with polish adhesion. An easy step to remember before polishing is to thoroughly wipe your nails with a cotton pad and a bit of nail polish remover. This removes excess oils and dirt and preps the nails for a long-lasting manicure."

...On the secret ingredient to literally any manicure:
"Quick-dry top coat! I am obsessed. I feel like nothing ever dries unless I apply quick-dry top coat. I can be impatient and restless so Sally Hansen Insta-Dri Top Coat saves my life. Many people underestimate the importance of top coat. I never consider a manicure finished until I've applied the clear gloss to seal the deal."
...On filing your way to Lana Del Rey talons, should you feel so inclined:
"It's great to have a variety of files from coarse to fine. Starting with a coarse grit file to work out the basic shape and using a fine grit nail board to perfect the shape. Try to file under the edge of the nail at slight angle to get rid of any feathering. It helps to use a buffing block afterwards like the Sally Hansen Professional Salon Smoothing Block. This 4-way buffer has options from coarse to fine depending on your desired sheen. It's best to use the more coarse varieties to buff if you'll be painting the nails. This will smooth out the tip of the nail as well."


...On why it's all about the red bottle:
"You want to be sure your base coat dries quickly, applies thin and doesn't create any streaks during polish application. My all time favorite top coat, which is very good for any extra nail design, is the fast drying Insta-Dri Top Coat (the red bottle!)."
...On the key to painting your non-dominant hand:
"Almost all colors require two coats and for a lasting manicure, the thinner the coat, the better. You should always flip-flop between hands so each hand has an opportunity to dry between coats. To paint with my non-dominant hand, I place the hand I'm painting on a table rather than balancing my hand in the air I use the table as an anchor.

...On playing double-duty with your make-up brushes (we're sensing a trend here):
"My favorite tip for getting polish off the cuticle is to use a small brush, something like an eyeliner brush dipped in a bit of nail polish remover. I'll follow the line of the cuticle with the edge of the brush to create a perfectly crisp clean line that doesn't leak."
...On literally the most genius way of cleaning up polish-stained cuticles ever:
"I will either use the Sally Hansen 'No More Mistakes Clean-Up Pen', which is a pen filled with nail polish remover or a homemade version of this using a makeup brush, something slender and flat like an eyebrow brush dipped in a small puddle of nail polish remover. Then, I'll take the brush and run it around the cuticle to create a perfectly round line and clean any spillage on the skin."
...On the one step we all need to stop skipping out on:
"I find that cuticle care is often neglected during an at home manicure. If the skin around the nail doesn't look cared for, the complete package is going to look a bit rough. I'm a big fan of the Sally Hansen Instant Cuticle Remover and Vitamin E Cuticle Oil. The cuticle remover will quickly soften the cuticles so you can use an orange wood stick or a cuticle pusher to push them back off the nail plate. Moisturizing the hand and applying cuticle oil to the fingers is also a key step though I prefer to add these things after my nails have dried so I don't interfere with the polish adhering to the nail."

...On breaking down the actual application process:
"After applying your base coat, the next step is to apply your first coat for coverage. Have just the right amount of polish on your brush, not too much and not too little. Start with one stroke down the center , this will help guide you to fill in the sides. Second coat is for coverage. Not everyone is perfect, if you get polish on your skin wrap a small piece of cotton on a wooden stick, dip into polish remover and clean the sides. I recommend only two coats of polish but if the polish is a thinner color and needs a third coat, go for it as long it's not too think."
...On her go-to base coat (looks like there's really something to that red bottle, guys):
"Favorite base coat would be ORLY Bonder, it dries super fast and it grips nail polish to the nail for long lasting wear. Favorite top coat would be Sally Hansen Insta Dri, anti-chip top coat (the red bottle). It really dries quickly and gives an amazing shine."


...On going nude (are you sensing that that bottle of CHANEL Vamp might have to wait?):
"My favorite shades for an at-home mani would be any nudes, sheers and pale pinks just because it's so easy to apply and if you make a mistake you can hardly notice."
...On the one tool no manicure is quite complete without:
"For me the most important tool to have for an at-home manicure would be a nail file. You may not have time to polish your nails but you can have a great shape before you run out the house, with a base coat to protect your nails. If you do decide to polish your nails and a smudge happens, don't worry: just quickly dip your finger tip into nail polish remover and smooth out the smudge then apply top coat. If its a deep smudge apply a thin layer of your polish and then top coat. For a quick chip fix, dab your polish color on chipped area, wait a few secs then apply another dab of polish, let it dry then apply your top coat. It's definitely a must for me to have a wooden tool on hand. I wrap a thin piece of cotton around the tip tightly, great for a easy clean up. Also, a cuticle nipper (Tweezerman is my favorite)."
...On the importance of moisturizing—yes, just like your mug:
Not everyone knows that it is very important to dehydrate the nail plate before applying your base coat. After filing, pushing back cuticle, nipping cuticle if need be and buffing you should dehydrate your nail beds, it allows your base coat to adhere to your nail plate perfectly for a long lasting manicure. I like to use pure acetone, it completely dehydrate my nail plate."