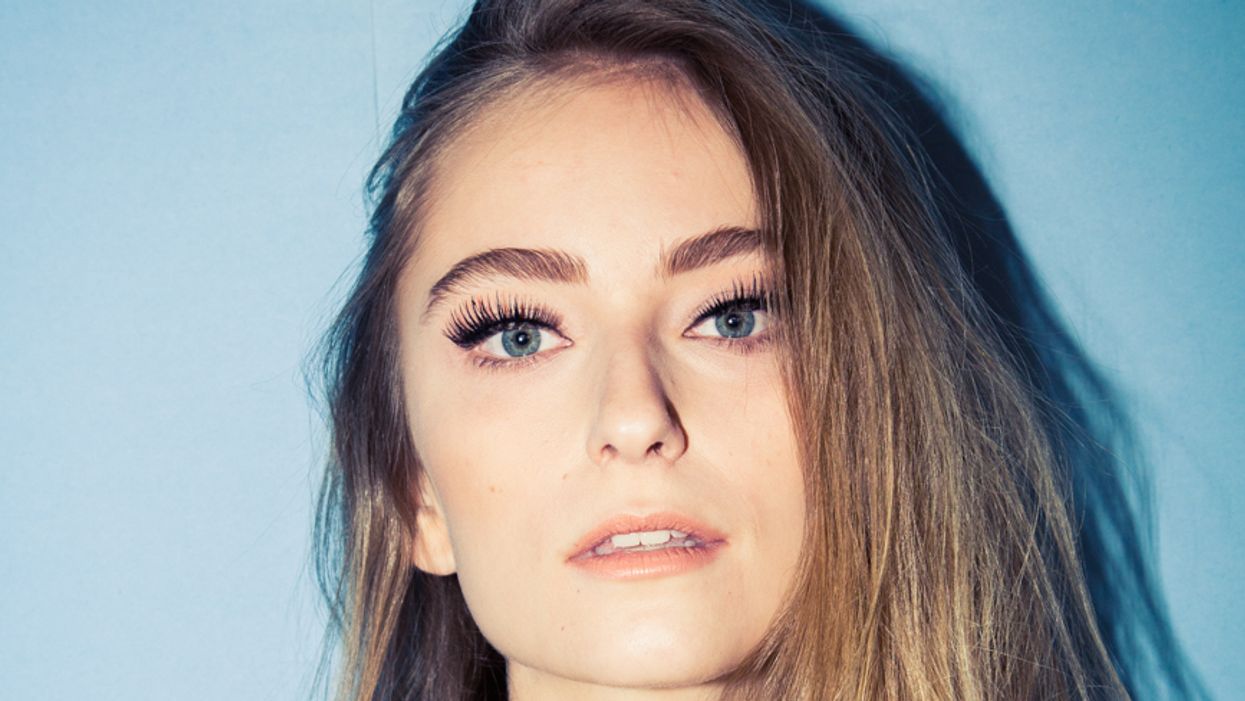
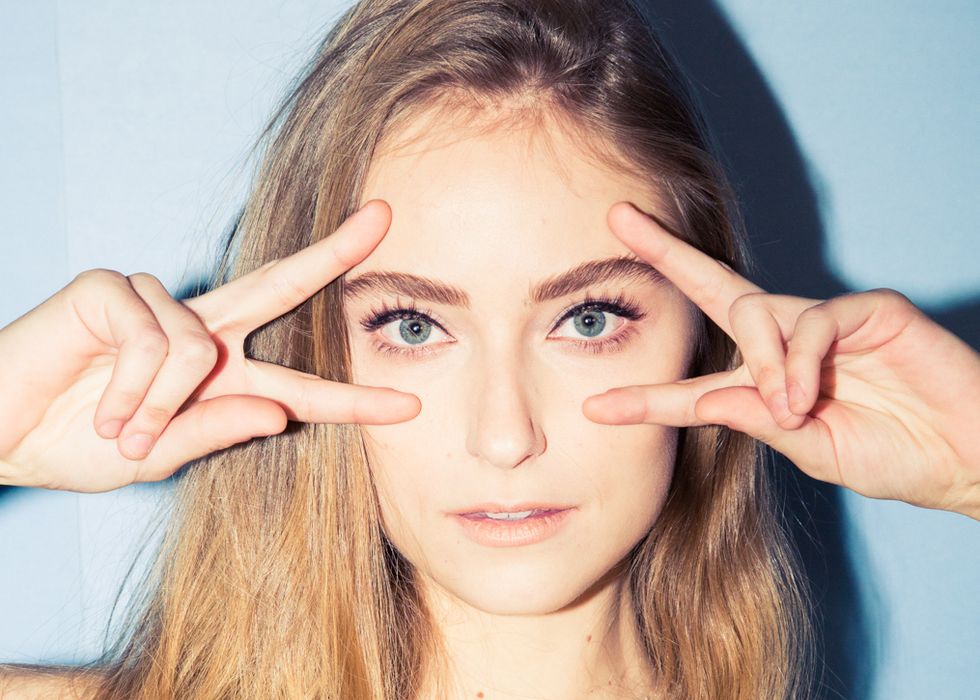
We’ve already established that the holidays are pretty much an excuse to go all out in the beauty department—actually make that in any department. Let’s be honest, from eating and drinking (hello, bottomless punch bowls) to our sartorial efforts (there’s much more, uh, bedazzling than usual) and, well, family time, these next two weeks are essentially the epitome of excess. So, continuing along with that theme, there’s really no better time to experiment with cartoonish eyelash proportions than now.
there’s really no better time to experiment with cartoonish eyelash proportions than now
Now, let’s get realistic here, because we’re not going all Kim-K-glamour-shot on the regular. In fact, if we’re being totally honest, the idea of applying glue anywhere near our eye area is downright terrifying. The end result, though? So effing dreamy. Enter M·A·C makeup pro Melissa Gibson and her very, very steady hand. We mean, after she applied two sets of lashes to our model Vera without so much as tearing a single lash off a lid, we might just feel confident enough to try the whole glue-to-face thing ourselves.
1.
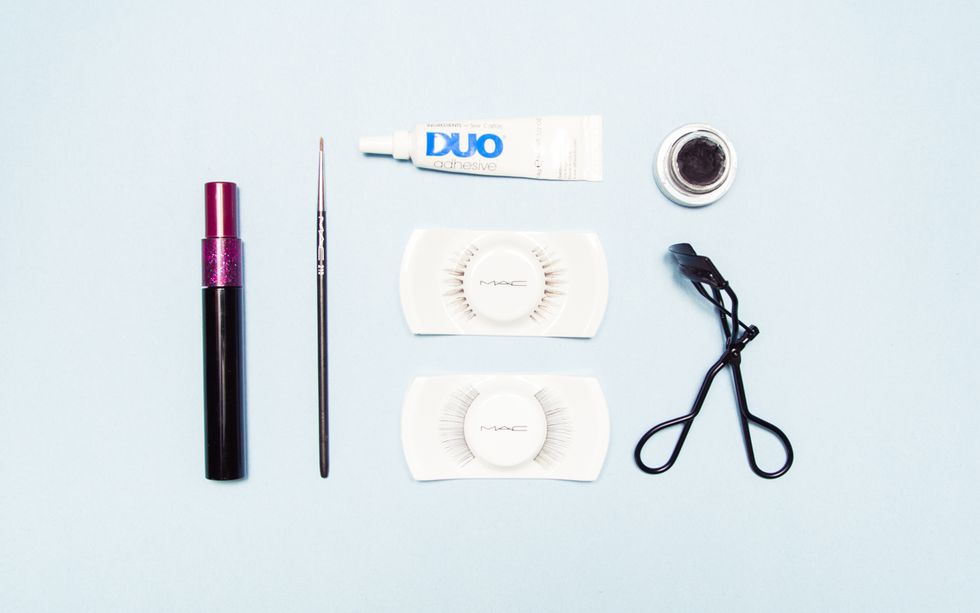
First, choose your lashes based on your desired length and thickness. Once you’ve decided which lashes, you can determine how thick you want them to be. When doubling up my lashes, I like to choose two completely different types; I’ll have one that’s chunkier and another that has more length and is more wispy, like M·A·C Cosmetics Lash 33 and 34.
2.
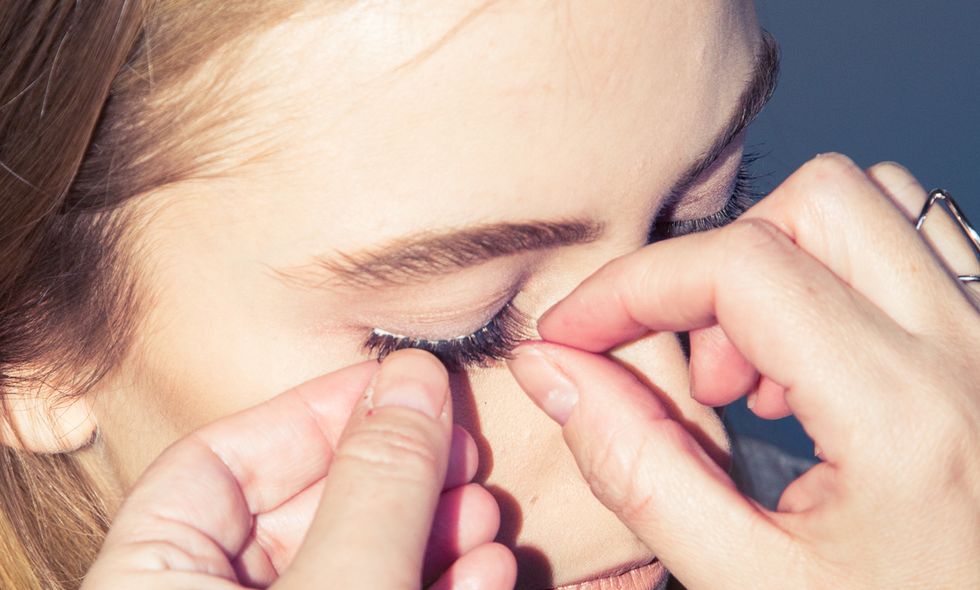
Put the lash on the eye without actually using glue to make sure it's the right length. From there, you trim from the outside in because you don't want it to look stubby on the inner corner. Trim off hair by hair, so you don’t end up chopping off too much.
3.
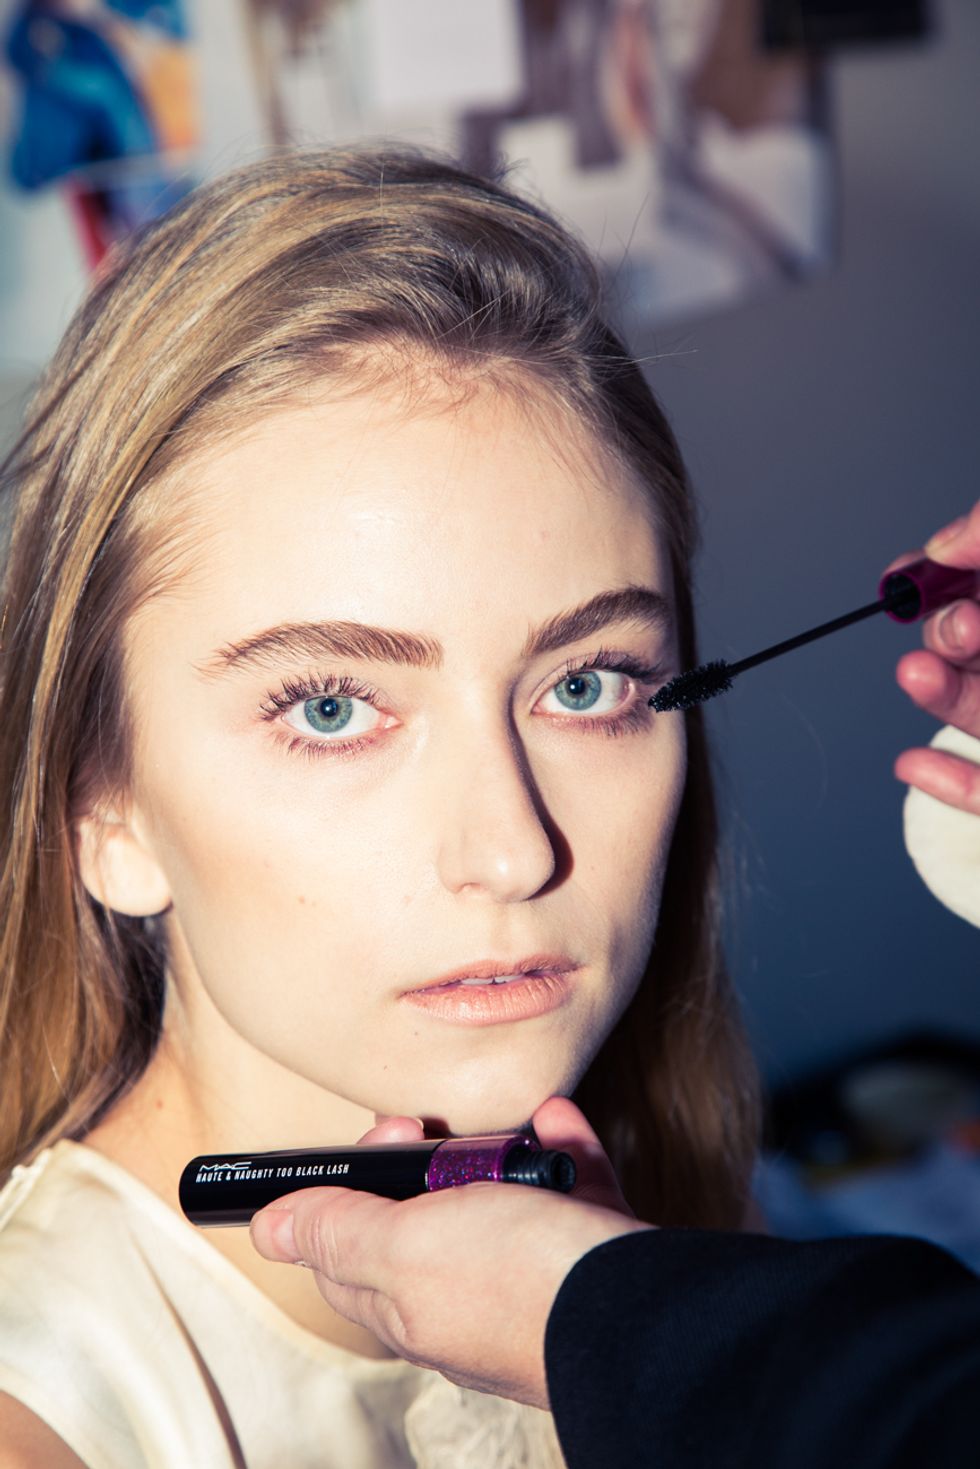
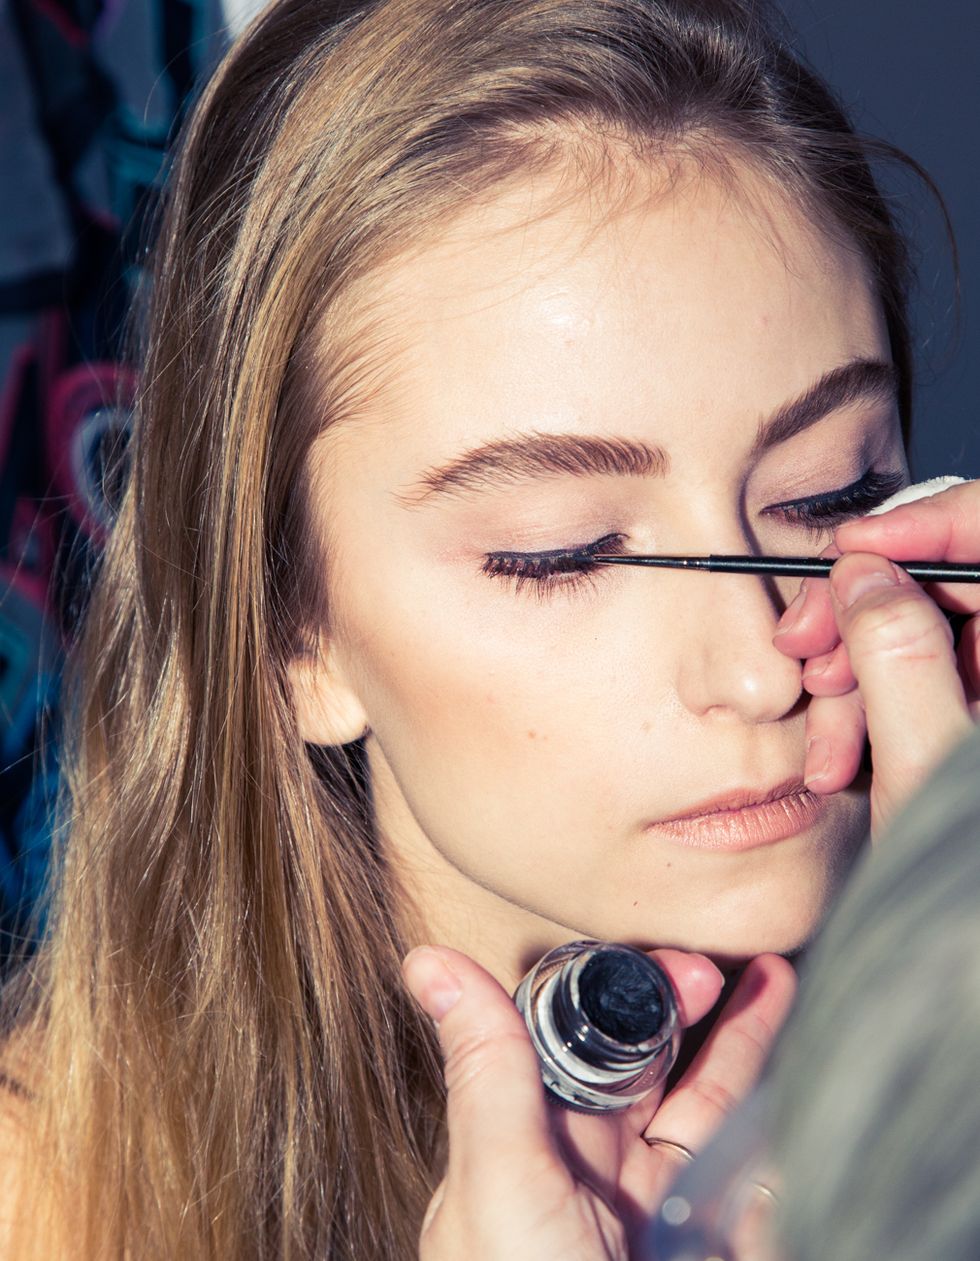
Then I take a little bit of liner, like M·A·C Cosmetics Fluideline in Blacktrack. [Sticking it on my hand,] I take a really tiny, little brush, like our Precise Eye Liner Brush 210 and take it to the rim of the lash to cover up any of the band, which often has an almost plastic-y look to it.
4.
Then I apply the lash, usually from the outer corner to the inner corner. I do the chunky lashes first, then the lighter, feathery ones. Take a small dollop of Duo Adhesive glue and apply it to the end of a small brush. Then, drag the brush along the edge of the lash. I usually add an extra two dollops onto the lash, one on the end and one on the inner corner, because that’s really where you don’t want it to start lifting. Then you do your outer corner, pushing it in. Gently push it in towards the inner corner—super easy. If you’re not comfortable doing that you can do a half lash.
5.
Then you add a little black eyeliner, or whatever color liner and just go over it, keeping as close to the lash line as possible. That way it seamlessly puts everything together.
6.
If you’re applying a second set of lashes, you’d now apply those on top. Let the glue dry. It goes on white, but dries to clear. Even still I’ll go in again with my liner and get rid of any sheen from the glue and let it all dry. Then it’s done!
Makeup artist, Melissa Gibson (M.A.C.)
Model, Vera (Sherrida)
3.1 Phillip Lim dress, Hudson's Bay
Model, Vera (Sherrida)
3.1 Phillip Lim dress, Hudson's Bay